Car paints can now be protected with finishes utilizing nanotechnology. Scratches and dents on automobiles are any automobile owner’s headache. Nanotechnology is ending up being significantly popular in Melbourne. This service is perfect for paint protection finishes and car paints. In fact, when it pertains to car paint protection Adelaide is ahead of lots of other cities.

Types of paint protection:

Nanotechnology based vehicle paint protection can be divided into 2 classifications, i.e., technology incorporated within the car paint formula and that which is utilized as a covering on standard car paint. The 2nd variety is more flexible. It is also a true blessing for pre-owned automobile purchasers. Such finishings further vary in their compositions. Examples of nanotechnology based coatings include ceramic polymer coatings and some nanoparticles containing coatings. The composition of the finishings eventually figures out the effectiveness of the finishing.

What nanotechnology based car paints and paint finishes provide:

For beginners, these paints and finishes securely affix the vehicle’s existing paint to the body of the vehicle. Therefore, scratches and swirl marks do not establish on the paint as easily as they would without such technology. Breaking of paints is likewise not likely with this innovation in the paints or thanks to the covering over the paint.

The nanotechnology based paints and finishings are also weatherproof. Therefore, water, heat, ultraviolet light, pollutants and some strong chemicals are not likely to damage the existing paint on the vehicle.

The automobile’s paint normally starts looking faded after a duration of time. With this finish, the vehicle looks as glossy as a new car.

Cleaning the automobile becomes very simple, and less time taking in too. Bird droppings can likewise be cleaned very quickly and will not damage the underlying paint. Likewise, a few of these paints and coverings safeguard the vehicle from scratches.

White paint on vehicles has the tendency to turn yellowish in time. Some of these finishings are specifically created to prevent this.

Conventionally, waxes and sealants were utilized for keeping water off from the automobile’s body. However these wear away within a year approximately, and they require to be used once more a number of times during the life expectancy of the automobile. Unlike such waxes and sealants, nanotechnology based automobile paints and paint coverings last for a long time, practically for the lifetime of the vehicle. Water, impurities and some extreme chemicals are accountable for the corrosion on the metallic frame once the paint wears away. Gunk likewise makes the car appearance dirty and cleaning it is not that simple either. However with nanotechnology based vehicle paints and paint finishes, cleaning gunk and dirt is significantly simpler.

Paint Protection in Melbourne

In Melbourne one of the most popular nanotechnology based paint coating is the Ceramic Pro. The manufacturer of this paint finish, which makes the automobile’s exteriors shine like a brand-new vehicle, provides a lifetime service warranty as well. As the name recommends this paint finishing consists of a ceramic polymer.

Conclusion:

Nanotechnology is relatively in the market of automobile paints. It will soon find its method into other paints and minimize the have to frequently paint vehicles. New techniques are still being studied making the technology even more efficient and individuals from Melbourne will be ahead of others in adopting such innovations.

Regular vacuuming and dusting of your car’s interior is the best way to keep it looking good. Regular interior maintenance is EASY maintenance. However, surface cleaning alone is not enough. Two to three times a year you will need to detail the upholstery to keep it looking its best. Since I use car care products from Detailcentral.com.au it never disappoints me.

Warning: Before using any product on your car’s fabric upholstery, carpet, leather or vinyl, test for color fading by cleaning a small, inconspicuous area. Do not use the product if it adversely changes your fabric’s color or texture.

The interior of this BMW has just been perfectly detailed. Notice how the leather has a nice, even matte finish. Professional detailers don’t leave a car’s interior looking wet and slick. The interior should look like it just arrived from the factory.

PROPER INTERIOR DETAILING

With the variety of materials used inside the modern automotive interior, knowing what to detail and how to do it is not always a straightforward matter. This section is divided into specific materials and areas of interior detailing. Read the areas that apply to your vehicle.

CAR VACUUMING

There’s no special science to car vacuuming. You need a good vacuum, a few attachments, and ten to fifteen minutes to get in there and get the job done.

A special car vacuum, such as this Vac ‘N Blo Portable Vacuum from Metropolitan Vacuum has all of the right attachments for car detailing. This car vacuum is under 18″ long and only 7″ in diameter. It comes with a 12′ power cord, a shoulder strap, a 6’ flexible hose, two 20″ extensions, a blower nozzle, pik-all nozzle, dust brush, crevice tool, inflator adapter and a 4-piece microcleaning tool kit.

The two most important attachments are the crevice attachment and the dust brush attachment. Make sure your crevice attachment is plastic, not metal. A metal attachment or a plastic attachment that’s in poor condition may scratch or otherwise damage leather or vinyl upholstery.

Use the crevice tool to reach between and under seats, into tight seams, nooks and crannies, and around seat beads. Vigorous movement on the carpet helps to bring up sand and grit.

Use the round dust brush attachment to vacuum the console, dash and vents. You can assist with the dusting by using an interior detailing brush ahead of the vacuum to get deep into vents and cracks.

Here Are The Steps For Proper Vacuuming:

Start your vacuuming job by pulling out the floor mats. Shake out the mats to remove any loose dirt. Use a 4″ upholstery attachment or the bare hose end to vigorously vacuum the mats. The more you’re able to agitate the carpet, the cleaner you’ll get it.

Work on the rear upholstery and carpet. Push the front seats all the way forward. Use the crevice tool to vacuum the cracks of the seats, and between the seats and carpeted areas. If the seat upholstery is fabric, switch to the 4″ upholstery attachment and vacuum the rear seat and the deck under the rear window. Vacuum the rear carpet. Use the crevice tool to vacuum around the seat tracks and under the front seats. Use the round dust brush attachment to vacuum the door panels.

Push the front seats all the way back to work on the front upholstery. Use the crevice tool to vacuum the cracks of the seats, between the seats and carpeted areas, and around the gas and brake pedals. Now switch to the 4″ upholstery attachment to vacuum the carpet in the foot wells and the seats (if the seats are fabric). Use the Auto Vent Brush to vacuum the console, vents and door panels.

Tip: When vacuuming carpet, use the palm of your free hand to beat the carpet just in front of your vacuum hose or tool. As you beat the carpet, dirt that is lodged deep into the carpet will come loose for vacuuming.

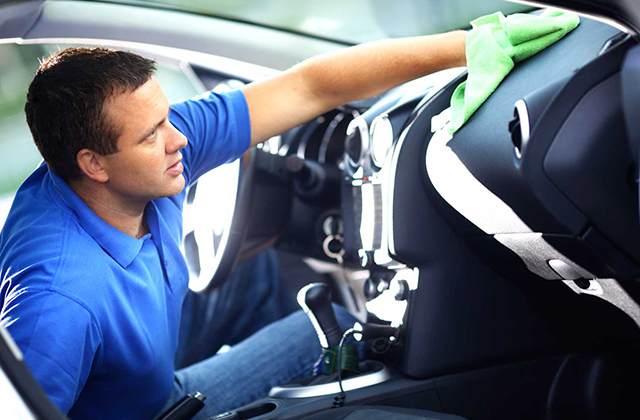
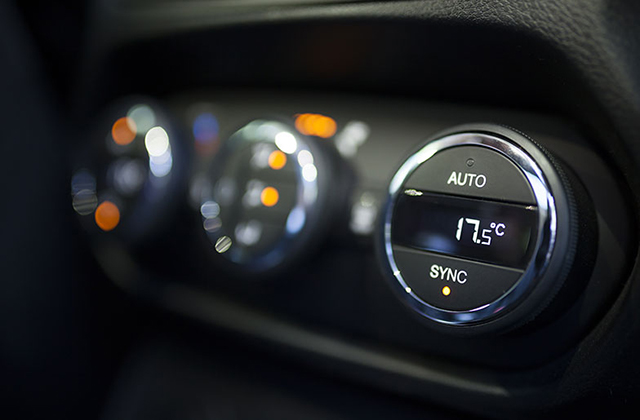
CLEANING AND TREATING YOUR DASHBOARD & CONSOLE

We look at the dashboard and console more than any other area of our car’s interior. It makes sense, therefore, that we should give it some special attention. The dash and the deck under the rear window also take the brunt of damage from sun exposure. In order to keep your dash from cracking and fading, regular treatment is necessary.

Caring for the dash and console is really pretty easy. Simply wipe them down with a damp Blue SilverClean Interior Detailing Towel every time you wash your car, and treat them with a vinyl protectant once a month. To reduce the effects of the sun’s UV rays, use products like BLACKFIRE Interior Protectant, 303 Aerospace Protectant or Ultima Interior Guard Plus, which contain protective UV sunscreens. These protectants create a perfect satin finish.

The easiest way to treat the dash and console is to use a foam applicator pad. Spray your vinyl protectant directly on the applicator, not on the dash or console, and wipe it in thoroughly. This will prevent overspray on your glass and upholstery. Don’t forget to protect the steering wheel, turn signal levers and the shift boot. Allow the vinyl protectant to soak in for 3 to 5 minutes, and then buff the dash and console dry with a Blue SilverClean Interior Detailing Towels.

If you’re doing a complete interior detail, you should also dust and clean out the vents and grillwork. There are a variety of tools that work in vents and grilles. Use the Interior Concours Brush and compressed air. If you don’t have compressed air, you can use the blow cycle on your vacuum. For heavily soiled interior surfaces, use Optimum Power Clean All Purpose Cleaner before agitating with the Mat & Carpet Scrub Brush. If you have a Dual Action Polisher, you can use a Carpet & Upholstery Brushes for Dual Action Polishers.

If your vents are disgustingly dirty, use a cotton swab or foam swab to clean out the dirt. A good vinyl cleaner and protectant works well on a foam swab to clean and beautify vents and speaker grilles.

On consoles with a lot of nooks and crannies, it’s best to use a soft bristled brush followed by a towel to clean and protect. This same method works well around buttons and controls on the dash. Aerosol products like McKee’s 37 Trim Detailer also work well in detailing areas and spots where your towel and finger can’t reach.

CLEANING AND TREATING DOOR PANELS & JAMBS

Door panels are often made of several materials, including fabric, vinyl, carpet and leather. Vinyl can be scrubbed to remove shoe scuffs. General-purpose cleaners, like 303 Multi-Surface Cleaner, or interior vinyl and plastic cleaners, like CarPro Inside Leather & Interior Cleaner, or Ultima Interior Shampoo Gel easily remove black scuff marks from these areas.

Thoroughly clean around door handles, pulls and window cranks, using a soft detail brush and interior cleaner. Be sure to clean and dry the speaker grilles and the wells on armrests, too. If the door panels have storage pockets, use your sponge or wash mitt to clean in these areas, as they tend to collect a lot of dirt and crud. Next, use your sponge or wash mitt and interior cleaner to clean all the way around the door frame and the doorsill. When you’re finished, dry the door completely with a clean drying towel.

If your door panel is leather or vinyl, be sure to treat it with a leather or vinyl protectant. Fabric door panels can be treated with a fabric protectant, like 303 Fabric Guard, to reduce staining and fading. Even if lightly soiled, it’s always a good idea to use an interior cleaner like Kenotek Interior Cleaner first, this way the panels are prepped for a protective coating. Keep in mind, you can use leather cleaners on vinyl, but I would not use a vinyl specific cleaner on leather. Combo products like Pinnacle Leather &Vinyl Cleaner are safe on both surfaces.

DETAILING VINYL AND PLASTIC PARTS

Vinyl and plastic are the most durable interior materials, but they do need frequent cleaning. Unlike cloth, the surfaces of vinyl and plastic generate static, which tends to attract dust. As a result, vinyl and plastic become grimy. The good news is, vinyl and plastic are the easiest surfaces to clean.

DO NOT use regular household soap and water on your vinyl and plastic surfaces. Detergent will permanently remove the sheen from vinyl and plastic. Choose a cleaner made specifically for interior surfaces. One of my personal favorite is Britemax Interior Cleaner Multi-Surface Cleaner, which is a quick spray-and-wipe solution that does not require rinsing. It’s also safe on all interior surfaces. For dirtier panels, some agitation may be required to loosen grime.

Follow these easy steps for the perfect vinyl interior:

  • Spray vinyl, plastic and imitation leather surfaces with Britemax Interior Cleaner Multi-Surface Cleaner or your favorite cleaner.
  • Work the cleaning solution into seams, edges and seat backs with a sponge or cleaning cloth. If you have stubborn dirt, use an upholstery scrub brush. If necessary, use an soft bristle brush to get into the small crevices.
  • If your cleaner requires rinsing, wash the vinyl and plastic thoroughly with fresh water and a clean microfiber detailing towel.
  • Dry the upholstery with a clean, dry Griots Garage PFM Terry Weave Drying Towel.
  • Allow the vinyl and plastic to dry, and then apply your favorite vinyl dressing to restore protection and sheen. Forum member favorites include BLACKFIRE Interior Protectant and Wolfgang Vinyl & Rubber Protectant.

A quick word about vinyl dressings: they’re not all the same. Choose a dressing that gives you the look you want (flat to shiny). Wolfgang Cockpit Trim Sealant creates a matte finish, whereas McKee’s 37 Interior Surface Protectant creates an attractive satin finish. Ultima Interior Guard Plus has the unique characteristic of taking on the original surface finish. So, when applied to a matte finish, Ultima Interior Guard Plus looks flat and applied to a glossy finish, like wood trim, Ultima Interior Guard Plus takes on a high gloss finish. Another thing to consider is protection from the sun. All of the products mentioned above offer great UV light protection.

CLEANING CARPETS AND FLOOR MATS

Most automotive carpets are very durable and will withstand repeated shampooing without signs of damage or wear. Carpet cleaning is not fast or easy. You should expect to spend 2 to 3 hours shampooing the front and rear carpet and mats in a sedan or SUV, a little less time for a truck or two-seater.

Before shampooing, the carpet and floor mats must be thoroughly vacuumed. To do a complete job, it may be necessary to remove the front seats, which requires the correct size Allen or socket wrench.

Follow these easy steps:

  • Spray spots and heavily soiled areas with a good spot remover. I recommend a product like Wolfgang Spot Eliminator or Dakota
  • Fabric Foam Carpet & Upholstery Cleaner.
  • Fill a bucket with 2 gallons of warm water.
  • Lightly spray a section of carpet (no more than 2 square feet at a time) with your carpet and upholstery cleaner. Use an upholstery brush or a sponge in a circular motion to agitate the upholstery. Dip your brush in water to keep it wet, but apply as little water as possible.
  • Wipe away the suds with a sponge or a damp detailing towel.
  • Empty your bucket of soapy water and refill with clean, warm water.
  • Rinse your carpet with clean water by wiping with a damp terry cloth towel. Rinse the soap from your towel often and wring it out. Use as little water as possible, but rinse thoroughly.
  • Vacuum your carpet to extract the remaining rinse water.
  • If you’re not working on a warm, sunny day, use a hair dryer to complete the drying process. Be careful not to scorch the carpet by holding the dryer too close.
  • Allow the carpet to dry overnight before using.

To keep your carpet and floor mats looking great, use a fabric protectant like 303 High Tech Fabric Guard. It’s really cheap insurance against spills and stains.

CAR INTERIOR DETAILING SUMMARY

Most of us spend 8 to 15 hours a week inside our cars, so it makes sense that we should keep them neat and tidy. Yet finding the time to detail the inside of the car is difficult with our busy schedules. If you take just five minutes each time you wash your car to remove the trash, shake out the mats, and wipe down the dash, console and seats, you can stay on top of this detailing chore. Then when it comes time for a full interior detail, the task will not seem quite so daunting. Hook us with a call if you have any problem with your car products.

Taking care or your car’s appearance doesn’t qualify as vanity; instead, it’s smart vehicle ownership. You can hire a professional auto detailer to care for your car for between $100 and $500 – or you can swipe their secrets, do it yourself and save some dough. If you are going to hire a detailer, ask a lot of questions, ask for references and to see sample work, and agree to a price in writing before the detailing work begins. Detailcentral.com.au is the leader in professional car products and auto detailing supplies.

With the free flow of information on the internet, do-it-yourselfers have access to all of the tools and tricks of the trade available to the pros. If you choose to detail your own ride, be prepared to spend a little bit of money gathering the proper tools and materials. You may already have most of the right stuff handy in your garage; if you must gather everything from scratch, you might spend from $30 to $100 or more, depending on how extensive you want your detail job to be.

The most important material that you’ll need is already in your tool kit. For many experts in the field, the secret ingredient is hard work and elbow grease. “Good detailing is 90% application and 10% product,” one detail professional said. “The best detailer can get decent results with decent products, but the worst detailer can’t get great results even with great products.”

There are few automotive maintenance chores that are more satisfying, accessible to all skill levels and truly beneficial for your car than a good detail job. We’ve collected the top secrets that will help you to get professional results, make your detailing more fun, more successful and easier.

Secret #1: Use Two Buckets to Wash
Detailers know that the two-bucket method is the best way to get your exterior clean. Use one bucket to hold your clean suds, and another bucket to hold clean water. Before you dip your cleaning mitt into the clean suds, rinse it off in the clean water bucket and wring it dry. Then, you’re always putting a clean mitt into the clean suds that will go on your car. If you only use one bucket, you’re just moving dirt off of your car, into your suds and back onto your car. Some pros have started using the Grit Guard insert, a $9.99 tray that helps sediment settle to the bottom of your wash bucket, instead of getting stirred up in the water and recollected on your wash mitt.

Secret #2: Join the Microfiber Revolution
We’re living the microfiber revolution. Pro detailers use color-coded, task-specific microfiber cloths and towels for greater efficiency, lower friction and scratching and easier washing, rinsing and drying. Mike Pennington, director of training and consumer relations for wax and polish supplier Meguiars, emphasizes that it’s important to wash your microfiber as a separate load, not mixed in with the regular laundry and rags. Microfiber will trap the lint from cotton towels, defeating the purpose of the wash. Use very little detergent and skip the fabric softener, which will coat the fibers and inhibit microfiber’s qualities. Double up on the rinse cycle, and your microfiber will perform at its best.

Also, remove any labels and stitching before you use your towels to avoid scratching. And remember, you get what you pay for – those cheapo packs of microfiber from the warehouse store are not nearly as good as the ones you can find at online specialty stores.

Secret #3: Detail Your Trim First
This tip comes from Jim Dvorak, a product specialist at Mothers Polish. He suggests using a trim protectant/restorer like Mothers’ Back to Black before waxing your paint. Wash and dry your vehicle, then apply the trim protectant. The product will repel polish and wax that might otherwise stain your trim. Some pro detailers use masking tape to protect the trim during waxing – this application can help save time and cleanup.

Secret #4: Use a Buffer to Apply Product, a Towel to Remove
Consumers sometimes get confused by the name of the tool, and use a power buffer to remove wax or polish from the painted surfaces of their cars. A buffer can leave erratic swirl marks in your clear coat and paint if used to remove product; that’s not what it’s for. Use the buffer to apply wax, and then use a soft, dry cloth to remove it. You’ll avoid burning the paint or damaging the clear coat, and you’ll wind up with a thin, even coat of wax.

Secret #5: Get a Dual Action Polisher
For just a little bit more than you’d spend on a good direct drive polisher and an orbital polisher, you can get the perfect blend of both tools with a dual action polisher like those manufactured by Flex. Based in Stuttgart, Germany, Flex has been making tools since 1922 and building dedicated auto finish polishers since 1988. Meguiars’ Dual Action Polisher is a little more consumer friendly, and less expensive than the Flex products. It doesn’t have the forced rotation, which keeps the tool moving even under a heavy load. Forced rotation is a great feature for an expert who knows how to use it; in inexperienced hands, however, it can do more harm than good.

Secret #6: Use a Clay Bar System
This secret may be out of the bag already, but it’s such a good one that it bears repeating. There’s no better way to remove surface contaminants from paint than with a good clay bar system. Pros have been using clay for years, and consumer versions have been on the market for at least a decade. A good clay bar system includes a spray lubricant, usually a detailing spray, an 80 – 100 gram clay bar, and a towel. According to Mike Pennington from Meguiars, after washing and drying your car you rub the clay bar on the paint to remove “bonded environmental contaminants” without removing paint thickness. The smoother paint surface takes polishing and wax better, and extends the life of subsequent treatments.

Secret #7: Use a Plastic Grocery Bag to Check the Paint Surface
Hers’s another tip from Jim Dvorak at Mothers. Once you have cleaned your paint’s surface of contaminants with a clay bar system or other cleaner, it’s important to make sure that you’ve really removed all the dirt before you seal the surface with wax. Put your hand in an ordinary thin plastic grocery bag, and run it over the surface of the paint. The plastic bag will amplify any bumps and imperfections – you can go back and detail again. Keep rechecking until the surface is totally smooth, then polish (if necessary) and apply protective wax.

Secret #8: Dry Your Glass in Two Directions
Here’s a great tip from Meguiars’ Pennington: Dry your glass in two directions. Get into the habit of doing your final wipe of interior glass in a horizontal direction, and the final wipe on the exterior in a vertical direction. Then, when you find the inevitable streak, you’ll instantly know whether it’s on the inside (horizontal) or the outside (vertical) of the glass. You’ll get perfectly clear glass without jumping in and out of the vehicle chasing that streak.

Secret #9: Brush It First
Pennington says that when it comes to cleaning interiors, mechanical agitation is always better than chemical intervention. That means that your first line of attack is a good brush. For instance, before vacuuming your carpeting, de-mat the fibers by using a stiff nylon brush. Then, when you vacuum, the dirt will be free in the carpet, and will be much easier to extract. The same goes for door panels, though you’ll want to use a gentler brush. If more aggressive cleaning is necessary, start gently, use a gentle solution of fabric cleaner, and dry with a soft cotton cloth.

Secret #10: Make Static Electricity Your Friend
To remove stubborn pet hair from your cars carpets, put on a pair of latex gloves (readily available in boxes of 100 from any home improvement store) and then rub your hand over the carpet. The static electricity caused by the latex glove will help bring the pet hair up to the surface of the carpet for easy removal by hand or vacuum.

Secret #11: Leave the Headliner Alone
According to Pennington, there’s one part of the car that detailers avoid if at all possible: the headliner. Even a little bit of agitation can cause the glue in a headliner to fail, causing far more more problems than it is worth. Keep your ministrations to a minimum when it comes to cleaning, brushing and tending to the headliner fabric. If you positively must clean your headliner, use very little moisture, and never allow it to soak through the outer fabric.

Auto detailing can be a great way to bond with your car, and to make your automotive investment go farther, last longer and look better. Hopefully these Top Secrets of the Auto Detailers will help you and your ride along the way. Find out here the secrets of auto detailers.